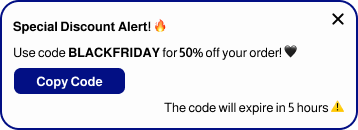
The Custom CSS feature in the Visuals tab allows users to fine-tune the design of their notifications by writing and adding custom CSS styles. This feature gives full creative control to users who want their notifications to stand out with unique and tailored designs.
How to Use the Custom CSS Section
Users can input their desired CSS styles into the Custom CSS text area. For example, if you want to change the color of links (<a> tags) in your notification, you can write:
a {

color: red;

}
However, if you don’t limit the scope of your styles to the notification container, these changes will affect the entire website, not just the notifications.
To ensure your styles apply only to notifications, prefix your selectors with #notif. For example:
#notif a {

color: red;

}
This will safely target only the <a> tags inside the notification container.
Live Preview and Immediate Application
- Changes made to the Custom CSS section are reflected in real-time in the Preview area of the plugin.
- After clicking Save, the changes are immediately applied to your website.
- Note: If you’re using a caching plugin, such as WP Rocket, make sure to clear your site cache after saving to see the updates live on your site.
No Syntax Validation
The plugin does not validate your CSS syntax or highlight errors. Ensure your CSS is correct before saving. If your styles don’t appear as expected, double-check your syntax.
For learning CSS or troubleshooting issues, we recommend exploring resources like W3Schools.
Creative Possibilities with Custom CSS
There are no limits to what you can achieve with CSS! Here are a few examples:
- Adding Gradient Backgrounds to Notifications
#notif .woo-notif-pulse-temp1 {

background: linear-gradient(45deg, #e3c3ff, #ffffff);
}
- Styling Notification Borders
#notif .woo-notif-pulse-temp1 {

border: 2px solid #4caf50;

border-radius: 8px;

}
- Customizing Notification Buttons
#notif .woo-notif-pulse-temp1 .action-button-parent a {

background-color: #2196f3;

color: white;

border: none;

padding: 10px 20px;

border-radius: 5px;

cursor: pointer;

}

#notif .woo-notif-pulse-temp1 .action-button-parent a:hover {

background-color: #1769aa;

}
Important Reminders
- Scope Your CSS Properly
Always use the#notifprefix to ensure your styles apply only to notifications. Without this, your CSS may unintentionally affect other elements on your website. - Best Practices
Use Custom CSS sparingly and purposefully. Avoid overly complex styles that might distract or confuse your audience. Focus on enhancing the user experience while maintaining the aesthetic consistency of your website. - Experiment and Learn
If you’re unfamiliar with CSS, start small. Play with basic styles and see how they affect the look of your notifications. Resources like W3Schools can help you learn and experiment with CSS.
The Custom CSS feature is available to all users, whether you’re using the free or pro version of the plugin. Take advantage of this powerful tool to make your notifications truly unique and aligned with your brand!


