WooCommerce is a leading platform for managing online stores, trusted by millions worldwide. Its flexibility allows you to customize every aspect of your store, making it easier to meet customer needs.
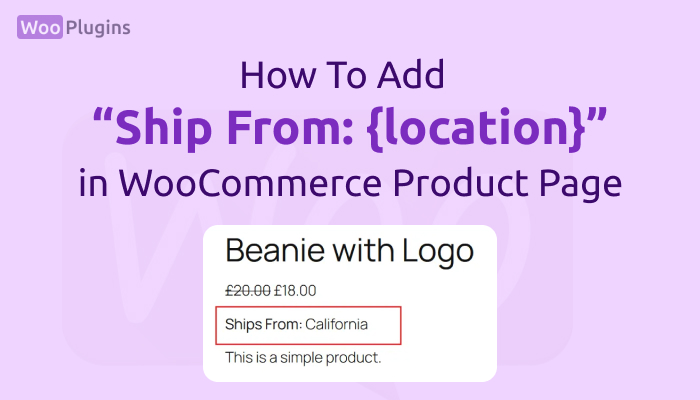
One feature that can enhance your store’s transparency and user experience is the “Ship From” location tag. By learning how to add WooCommerce ship from location tag, you can provide clarity to your customers about where their products are coming from. This small but significant detail helps build trust, manage expectations, and streamline the shopping experience.
In this guide, I’ll show you exactly how to implement this feature in your WooCommerce store, step by step, so you can create a better customer experience.
Why Add a “Ship From” Location Tag in WooCommerce?
Adding a “Ship From” location tag to your WooCommerce store might seem like a small detail, but it can significantly impact your store’s transparency and customer experience. Here’s why it matters:
Benefits of Displaying Shipping Origin
- Transparency for Customers Customers want to know where their products are coming from. Displaying the shipping origin builds trust and assures them that they’re making an informed purchase.
- Improved Customer Experience A “Ship From” tag helps customers estimate delivery times more accurately. For example, knowing a product ships from their region might encourage them to buy due to faster shipping times.
- Regulatory Compliance For stores shipping internationally, providing shipping origin details can help comply with tax and customs regulations, avoiding unnecessary delays or issues.
Common Use Cases
- Multi-Vendor Marketplaces If your store has multiple sellers, a “Ship From” tag ensures customers know which vendor is responsible for shipping their item.
- Businesses with Multiple Warehouses For stores with products spread across various locations, this tag helps clarify which warehouse the item will ship from.
- Stores Shipping Internationally Highlighting the shipping origin is particularly useful for international customers, who often care about where their product is being shipped from due to customs or delivery concerns.
By learning how to add WooCommerce ship from location tag, you’ll make your store more transparent and user-friendly, meeting both customer expectations and regulatory needs.
Step-by-Step Guide: How to Add a Ship From Location Tag
Step 1: Use WooCommerce’s Built-In Features
WooCommerce provides some built-in tools to help you manage shipping settings effectively. While these features might not explicitly call out a “Ship From” tag, you can set up shipping zones and classes to represent locations. Here’s how you can do it:
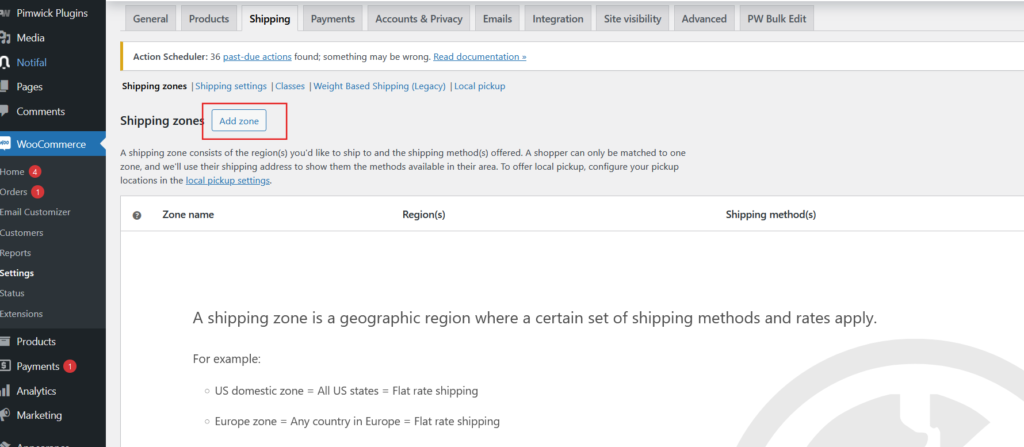
- Navigate to Shipping Settings Go to your WordPress dashboard, click on “WooCommerce,” and then select “Settings.” From there, head to the “Shipping” tab. This is where you can configure shipping zones and methods.
- Create Shipping Zones A shipping zone represents a geographical area. For example, you can create zones like “United States,” “Europe,” or even specific states or cities. Assign shipping methods to each zone to reflect where your products ship from.
- Add Shipping Classes Shipping classes can act as your “Ship From” tags. Create classes for each location (e.g., “Ships from New York,” “Ships from London”). To do this:
- Click on the “Classes” tab under “Shipping.”
- Add a new class for each location tag you need.
- Assign Shipping Classes to Products Once your shipping classes are set up, assign them to individual products. Edit a product, scroll to the “Shipping” section, and select the appropriate class that represents its shipping origin.
- Display the Shipping Origin While this setup helps configure shipping details behind the scenes, you’ll need to customize your product pages to show the “Ship From” information. This might require additional tweaks or plugins, which I’ll explain in the next steps.
By following these steps, you’ll have a basic structure in place to add WooCommerce ship from location tag functionality using the WooCommerce built-in feature. It’s simple to implement it on your site.
Step 2: Add Custom Fields to Product Pages
If you want more control over how you display the “Ship From” location, adding custom fields to your product pages is a great option. This is where plugins like Advanced Custom Fields (ACF) come into play. Let me walk you through the process:
- Install and Activate ACF
- Go to your WordPress dashboard.
- Navigate to “Plugins” > “Add New.”
- Search for “Advanced Custom Fields.”
- Install and activate the plugin.
- Create a Custom Field for “Ship From” Location
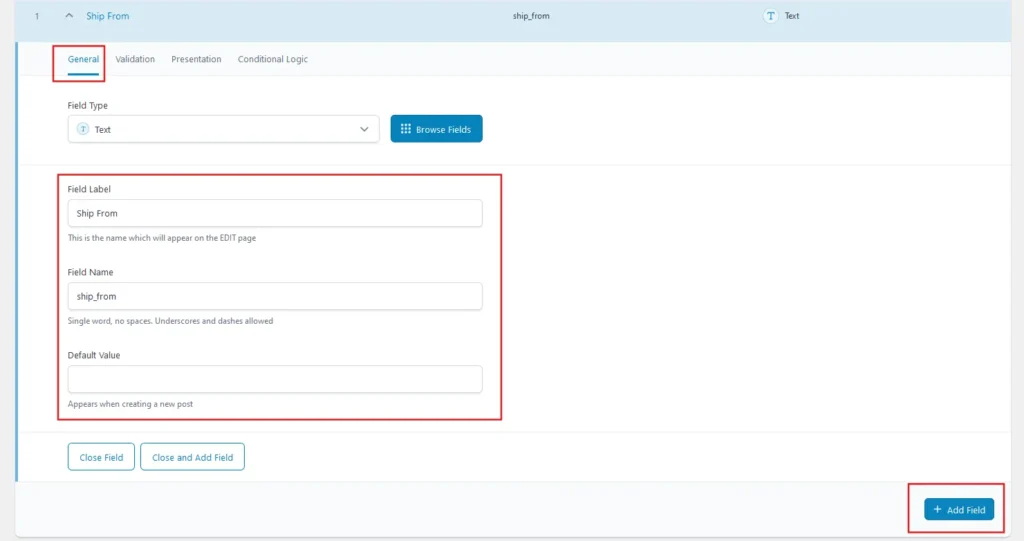
- General Tab
- Once ACF is active, find the menu “ACF” and click on it.
- At the top of the page, click on “Add New”
- Choose the field type (e.g., Text).
- Enter your field label (e.g., “Ship From”), and the name (save key) will be entered automatically.
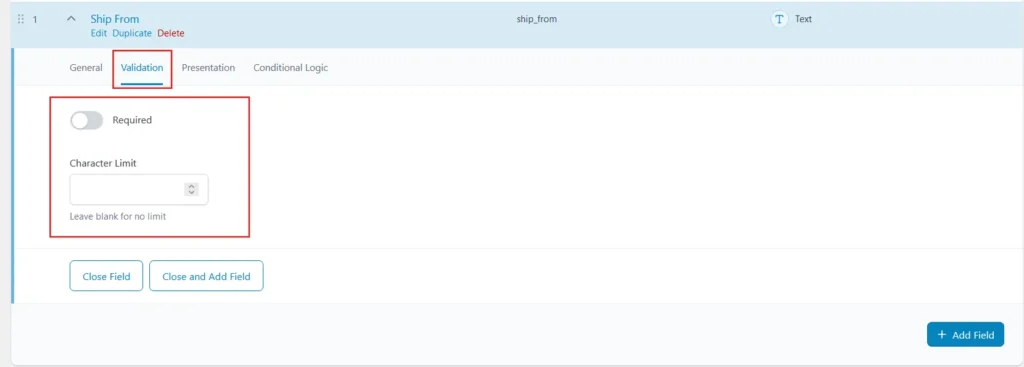
- Validation Tab
- If this field is required, check “Required”
- if characters is limited in length, enter the length in “Character Limit”
- Some additional settings in Presentation and Conditional Logic, you can check and set the fields
- If you need more fields for shipping info, click on “Add Field”.
- General Tab
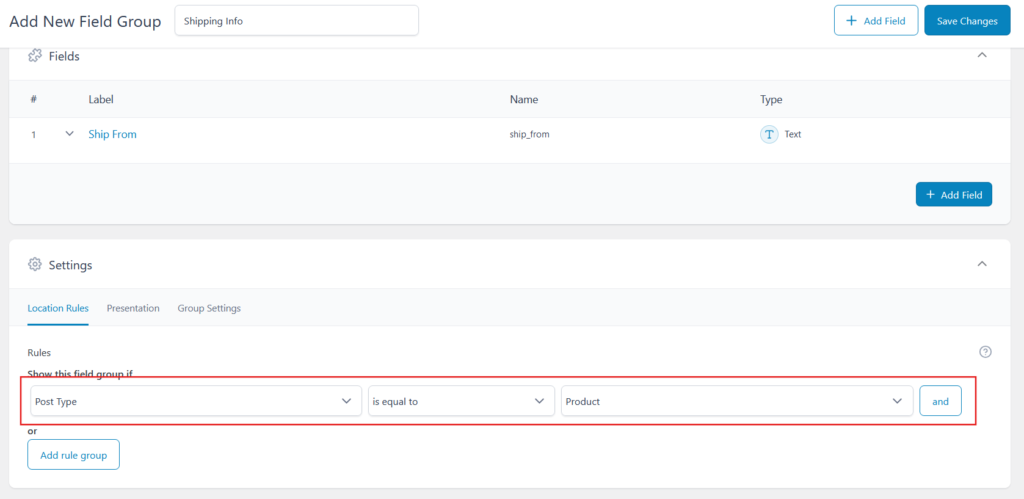
- Assign the Field to Products
- In the field group settings, specify where the field should appear. For this, choose “Post Type” and set it to “Product.”
- This ensures the custom field appears on all product edit pages.
- Input the Shipping Location
- Edit a product in WooCommerce.
- You’ll see the new “Ship From” field in the product editor.
- Enter the location (e.g., “California”).
Step 3: Display the Tag on Product Pages
To make the “Ship From” information visible on the product page, you’ll need to add a small piece of code to your theme’s functions.php file:
add_action('woocommerce_single_product_summary', 'display_ship_from_field', 25);
function display_ship_from_field() {
    global $product;
    $ship_from = get_post_meta($product->get_id(), 'ship_from', true);
    if ($ship_from) {
        echo '<p><strong>Ships From:</strong> ' . esc_html($ship_from) . '</p>';
    }
}
This code retrieves the custom field data and displays it on the product page.

By using ACF, you can easily add WooCommerce ship from location tag functionality and customize it to fit your store’s needs. This approach is especially useful if you want to tailor the information for different products.
Conclusion
Adding a “Ship From” location tag to your WooCommerce store is more than just a feature; it’s a way to enhance transparency and meet customer expectations. Shoppers appreciate knowing where their orders will be shipped from, and this simple addition can help improve trust and streamline their decision-making process. It’s also essential for complying with shipping and tax regulations.
In this guide, I’ve walked you through the key steps to add WooCommerce ship from location tag functionality. Whether you’re leveraging WooCommerce’s built-in features or diving into custom solutions like Advanced Custom Fields, there’s an approach that fits your needs. From creating shipping zones to adding custom fields and displaying the information on product pages, every step contributes to a more professional and user-friendly store.
Now it’s your turn to take action. If your products are shipped from different locations, this feature becomes even more critical. Implement these solutions to make your store more transparent, customer-focused, and efficient. By addressing this seemingly small detail, you’ll not only meet your customers’ expectations but also set your store apart from the competition. Start optimizing today and see the difference it makes!
